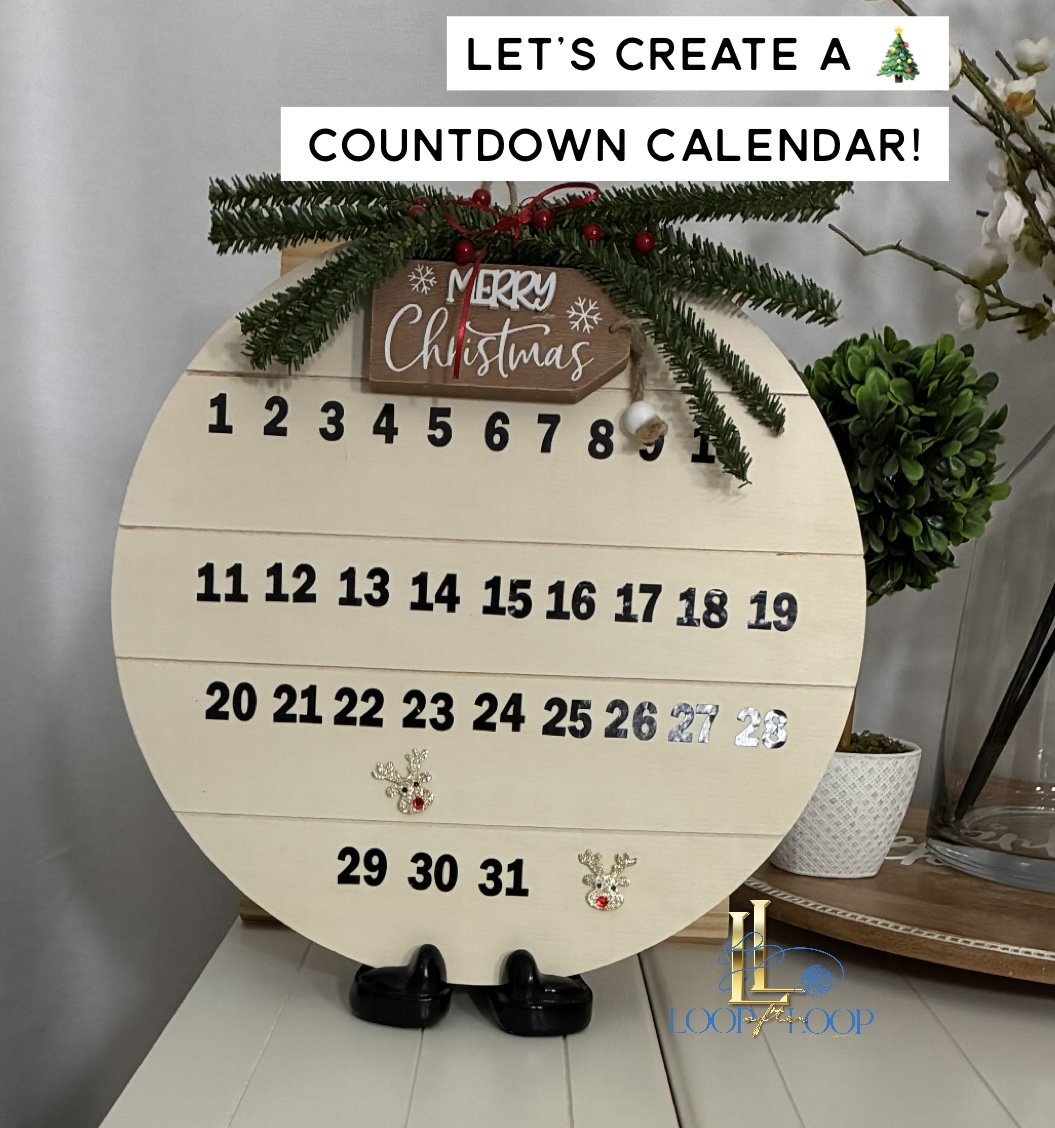
Crafty Weekend Project #6: How to Make a Christmas Countdown Calendar

There’s something magical about counting down the days to Christmas and this easy DIY project brings that charm right into your home! For Crafty Weekend 6, we’re creating a handmade Christmas Countdown Calendar that’s festive, simple, and perfect for crafters of all levels.
What You’ll Need
- Wooden countdown board or wooden sign
- Number stickers or stencils
- Small holiday embellishments (reindeer stickers, bells, ribbon, etc.)
- Mini sign topper (like “Merry Christmas”)
- Tacky Glue
- Pine greenery, berries, or decorative picks
- Marker or paint (optional for extra details)
Step-by-Step Instructions
- Prepare Your Board
Start with a clean wooden board or pre-cut countdown shape. If you want a polished look, give it a quick coat of paint or leave it natural for a rustic feel.
- Add the Numbers
Use stickers or stencils to place numbers 1–31 (or 1–25) in clean rows. Keep your spacing even as this is the foundation of your calendar!
- Create the Topper
Choose a small wooden sign that sets the tone — something simple like “Merry Christmas.” Attach greenery, berries, or ribbon to the top using tacky glue. This gives your countdown a beautiful holiday touch.
- Attach Your Topper to the Board
Secure the decorated topper to the top of your countdown board. Make sure it’s centered and firmly glued.
- Add a “Marker”
Use a small embellishment — like a glittery reindeer head to mark each day as Christmas gets closer. Simply move it along the numbers each day.
- Add Extra Festive Touches
Feel free to glue on additional accents such as bells, bows, more greenery, or sparkling stickers to personalize your piece.
Your Countdown Is Ready!
Hang it in your home and enjoy the excitement each day brings. This simple DIY is the perfect holiday warm-up project, charming, creative, and full of Christmas spirit!

0 Comments